There are a few tricks with baking bread at home that make up the difference between a lackluster and spectacular shaft. One of them is a heavy baking area to get a beautiful soil crust, and another creates a steaming environment for a high loaf. The management of these requirements may sound according to a challenge or how expensive devices may be involved, but you can solve both requirements with a common piece of cookware: the Dutch oven.
Why should you bake bread in a Dutch oven
A heavy baking surface, like a brick, is light enough to get, but an oven injected with steam like the bakeries is not as common at home. Steam is for a completely risen bread that is opened exactly where you achieve it. The moist air enables spring spring and it is the last time that your bread increases after all the evidence. Without moisture, the bread immediately develops dry skin that hinders the oven spring. This can start your loaf and also make it open in an unintentional seam when the inside of the bread starts a few minutes later. Moist air in the first five to ten minutes of the baking ensures that the crust does not develop too early and the dough is expanded as far as possible.
There is the old pan of water trick, in which they add water into a hot pan in the oven, in the hope that it dampens things during her bread, but I think this is not always sufficient because the oven is like that Large room and steam is quickly triggered. If you only had a small, closed room from a high -performance material to capture the natural moisture of the bread and to distribute the heat evenly. Oh. Right.
The Dutch oven is like a brick And A steam bundle rolled everyone into one. (And if you don’t have one yet Here are some affordable options.) The Dutch oven makes a big difference in the ascent, which my sourdough becomes compared to the method of the brick and the water pan.
How to make bread in a Dutch oven
You can do any bread with yeast in a Dutch oven (and a ton of Other things Also) Simply make sure that the loaf for the pot you have is not too big. A round bread that is fully checked and baking should have a centimeter clearance up to a few centimeters and a few centimeters above. A big climb is what we count on, so you don’t want the room to be cramped.
If your Brotteig has already done the Bulk Proof and it has been shaped, put it for his second proof of a large piece of parchment paper. Then you can set up your oven.

Credit: Allie Chanthorn Reinmann
My Dutch oven is quite large, so I put the rack on the position as a second over roof so that I have enough space. About 30 minutes before completing your bread, put a lid on your Dutch oven and put it in the oven to preheat. Set the oven to the temperature you need. I will set mine for the sourdough to 450 ° F. Remember that most Dutch stoves are up to 500 ° F or higher, but sometimes the handle on the lid is not. Check your brand to ensure. If your lid is not safe with the oven, cover a baking sheet to cover the top. It’s not perfect, but it will.

Credit: Allie Chanthorn Reinmann
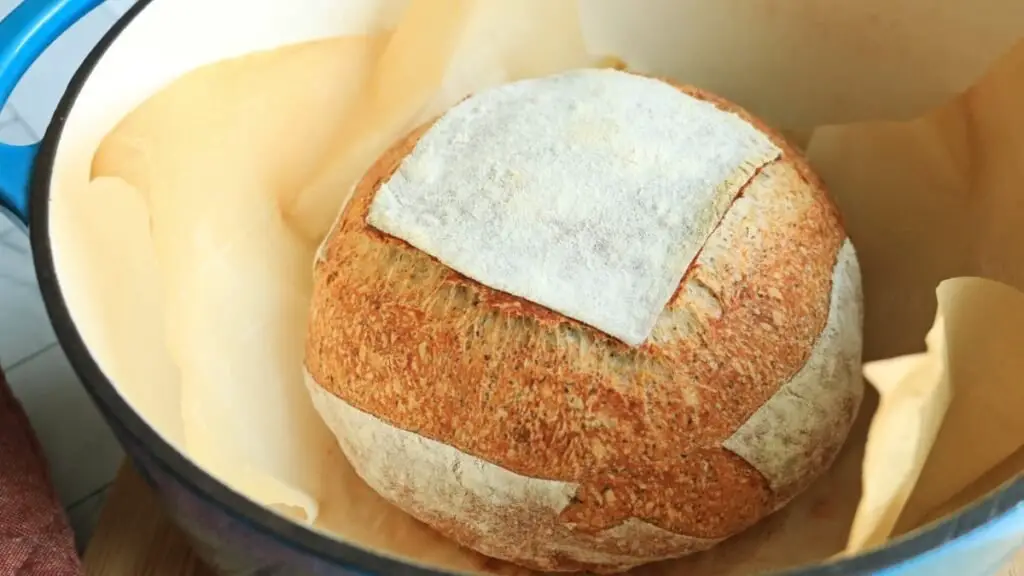
As soon as the bread is ready to be baked, rate the bread as you want. I am part of the square value. Carefully take the Dutch oven out of the oven with gloves. Remove the lid. Lift the bread on the parchment paper corners and lower it into the pot. Put on the lid (if you use a “cover” baking sheet, put it on as soon as the pot is in the oven) and put the entire Dutch oven back into the conventional oven. Bake it as long as your recipe shows. Remove the lid so that the bread can brown. Carefully take the bread out of the pot to cool on a rust.
My Dutch furnace -once recipe
This recipe naturally uses a sourdough starter for taste and the sourdough. However, if you are not in business, keep a starter nearby (and if you want, but it continues, it continues. Read that) Then you can only stir a teaspoon of active dry yeast into the water measurement before adding the flour and salt.
Ingredients:
-
7 ounces of room temperature water
-
4 ounces of sourdust starters
-
10 ounces of high glow flour
-
0.25 ounces of salt
1. Mix the water, the starter and the flour in the bowl of a blender. I use the dough hook and stir the things until the dry parts are moistened and the dough looks shaggy. Let this rest for 15 minutes. This short autolysis helps to supply the flour with moisture and strengthen the gluten.
2. Set the dough hook and roll on the machine and start it at the first speed. Sprinkle the salt as it stirs. Place the machine on the second speed for three minutes and the third speed for another three minutes. The dough can stay a little down first and that’s fine – it will gather at the end.

Credit: Allie Chanthorn Reinmann
3. Place the dough in a slightly oiled bowl and cover it with plastic film, a plastic bag or a Hotel shower cap. Place this bowl in a warm area or my favorite Cup of warmer proofing rig. Fold the dough into half every 45 minutes and turn it around. This is particularly helpful for sourdough, but if you have used active dry yeast, you can be.
4. As soon as the dough has doubled, you usually have two to three hours, depending on how active your yeast is, on a slightly floured surface. Fold the dough in half to switch off the air. Form the dough into a square and collect the edges together to make a wallet. Dust dust away and turn the handbag over. Use your hands to put on the skin of the dough and shape a ball. Here is mine Video about dough shape. (In my opinion it is very helpful.)
5. Place the RAIB on a large piece of parchment paper and cover it with a tea towel and drape it over the same piece of plastic that you used before. Leave this evidence for about 45 minutes or until a fingerprint goes back halfway.
6. Heat the Dutch oven in the conventional oven during this detection time. If the bread is ready for baking, rate the bread with a sharp jagged knife or a lame. Take out the pot, grab the corners of the parchment paper and lower the loaf into the pot. Cover the Dutch oven and put it in the oven to bake for 15 minutes. Remove the lid and let the bread in the oven to end baking for another 10 minutes. Cool the finished loaf on a wire cooling shelf.